Juliet Uzor - aka Sew So Natural - is a Great British Sewing Bee winner, fashion enthusiast and mum, who uses her videos to help demystify sewing for those who're just getting started.
Here she has a step-by-step guide to help you and your child make their own personalised Christmas stocking or even start a family stocking production line!

How to make a Christmas stocking
What you need
My name is Juliet Uzor and in this video I have team up with BBC Bitesize Parents' Toolkit to bring you a very exciting Christmas stocking craft to try out with your children at home.
For this project you will need felt. I have white, red and green felt but feel free to use other felt colours and the felt is A4 sized. I also have some A4 paper, pencil, scissors. I have some glue. I have some embellishments here for the children to decorate the Christmas stockings. I have a needle here and for the needle we will need embroidery floss.
First things first, you want to sketch a quick template of a stocking on A4 paper and try to make it as wide as you can.
Here I have two pieces of felt I am going to use the template that's been cut out to cut 2 red fabric pieces so lay it on the felt and you could use your pins to hold the felt in place. I've cut out two pieces of felt and I'll apply some glue to the white felt and stick it onto the red felt.
What you need to make your felt Christmas stocking
- A4 sheets of felt in 2-3 colours. 2 colour sheets in each colour, red, green and white
- A4 paper
- Pencil
- Safety scissors that can cut through paper and felt
- Non-Toxic glue - fabric glue, PVA or similar
- Buttons or other embellishments for decoration
- A sewing needle and pins - adult supervision may be required for younger children
- Embroidery floss - in a contrasting colour to your felt
First, sketch a quick template of a stocking shape onto the A4 paper. Try to make it as wide as you can on the page. Now cut this out. Take two pieces of felt in the colour you want the main body of the stocking to be, and attach the stocking template using pins to hold it in place. Now cut around the template through the felt, so you have two felt stocking shapes.
Take two other pieces of felt – cut them out into squares/rectangles the width of the top of your stocking to resemble a ‘turn over’. Using fabric glue, stick these squares to the top of the stocking on opposite sides.
How to sew your stocking together
Embroidery floss comes in different colours and but I would recommend you go with a contrasting colour because it would make the stitches stand out and make them more of a decorative feature.
So I will be going with a colour that would be lighter than the red stocking. At this point I divided the embroidery thread into three strands and cuts a length that you feel comfortable with, and when it's passed through the needle, I will tie and knot only at one end of the threads.
Starting from the inside, when to pass a needle through, we will be creating a blanket stitch. Because blanket stitches look beautiful, they create a decorative finish to the edge of your stocking. So that's what we will be using.
So now we've created the very first stitch there we're going to pass the needle in from the back and we want to have a nice wide gap between both stitches and have them the same length as well, pull the needle through. So through the hole from the front and we will pull through.
So we have our stitches looking like this. You want to make sure that the stitches are quite tight but not too tight, that the fabric starts to pucker. If it puckers it would look a bit like this and create creases. So you want it to be tight but not too tight.
Choose embroidery thread in a contrasting colour to the felt. Divide the thread into three strands, so it is easier to fit through the eye of the needle and cut to the same length. Once separated thread one strand through the needle. Knot the thread at one end. Start at one corner of the stocking and using a blanket stitch, sew down the side to create a decorative edge.
As you sew pull the stitch tight - but not too tight - and make sure there's an equal amount of space between each stitch To help your child, you could make faint marks around the felt, equal distances apart, showing them where they need to put the needle each time.
Work your way around the whole stocking leaving a gap at the top. Finish with a knot at the last stitch.
How to decorate your Christmas stocking
So we're getting towards the end and we need to have some type of ribbon over here to make it easy to hang our stocking. I have this ribbon that I really like. I'm going to fold it in half and pin it in the middle of the fabric. When it's nice and pinned, I will continue with my stitching.
OK, so for this very last one, I want to make a knot my knot is going to be on the back of the stocking. So I'm going to move this to the back by just pushing the needle from the front to the back and now we're at the back.
Now what I'll do at this point is I will pass the needle through the very edge and using this side and way to wrap it around the needle two or three times. Hold it down and pull the thread through and trim the thread.
Here we are, we have our stocking, but we're not done yet because there are so many things we could do to make this a lot more personalised. So what I could do is I could attach this bell right here. So we've got a bell here, so I have these sticky embellishments that could go here. Another thing that I did with this one here was I actually cut out a little section here which got stitched onto the stocking. Here we go, a fun, creative Christmas craft for you to do with your young ones at home. I hope you have a Merry Christmas with your family. Take care.
Before the last stitch, pin a loop - this could be ribbon, or twine - in the top corner of the stocking. Finish sewing. You and your child can decorate the stocking with bells, ribbon or other embellishments by stitching or gluing.
Maybe use felt offcuts or bits of another colour of felt to make a shape you can add to the stocking Your child could also personalise by adding initials!
More from BBC Bitesize Parents' Toolkit…
Parents' Toolkit
Fun activities, real-life stories, wellbeing support and loads of helpful advice - we're here for you and your child.


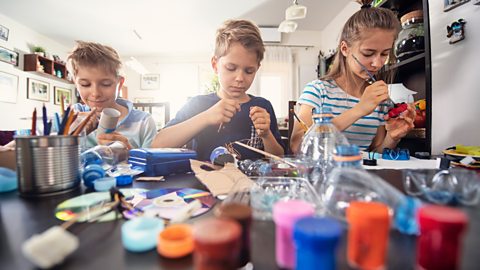
Up-cycling at home: ideas to get crafty with your kids
Crafty ideas for turning everyday objects, destined for the recycling bin, into fun activities for kids at home.
Fun ideas to bring more colour into your family's everyday life
Brighten up the winter months with colourful activities for all the family.

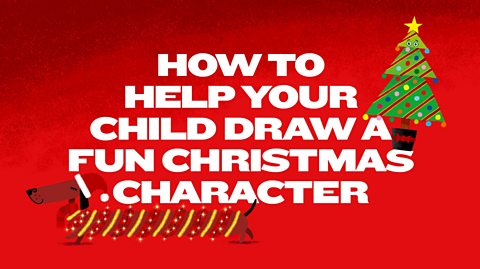
Rob Biddulph: How to help your child draw a fun Christmas character
Rob Biddulph - author, artist and official illustrator for World Book Day gives step by step video tips to help parents and children draw a festive favourite together.