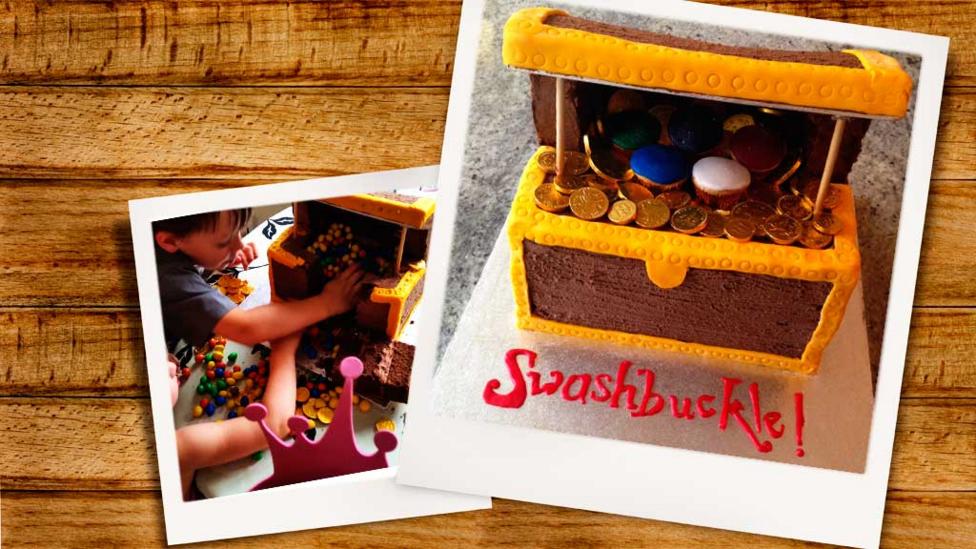
Swashbuckle Treasure Chest Piñata Cake
CBeebies-themed birthday cake from Great British Bake Off finalist, Richard Burr.
“Hey-ho, Swashbucklers go, take on this cake, yo-ho-ho!”
Ingredients
For the chocolate sponges
16 large eggs
900g unsalted butter, room temperature (plus extra for greasing)
900g caster sugar
700g plain flour
200g cocoa powder
10tsp baking powder
For the chocolate buttercream
1kg icing sugar
100g cocoa powder
500g unsalted butter, room temperature
A few tbsp milk (see method below)
For Gem’s gems
1 large egg
55g unsalted butter
55g caster sugar
55g plain flour
½ tsp baking powder
½ tsp vanilla paste
250g icing sugar
Boiling water by eye (see method below)
Blue, green, purple and red gel food colourings
Edible glitter
For the decoration
500g fondant
Yellow gel food colouring
3 x 165g bags of coloured sweets of your choice
3 bags of chocolate coins
Kit needed
Rectangular baking tin, mine is 26 x 21cm
Baking parchment
Square cake board, mine was 36cm2
Rectangular cake card cut to the size of the sponges
2 lengths of dowling
Electric hand whisk or electric stand mixer
Small offset palette knife
Mini cupcake cases (mine were gold)
Mini cupcake tray (optional)
Small piping bag
2mm piping nozzle
Cocktail sticks
Rolling pin
Ruler
Cooling rack
Method
Chocolate sponges
Warning: this is a big cake! It’s made of four separate chocolate sponge cakes. Make each sponge cake one at a time with 4 large eggs, 225g unsalted butter, 225g caster sugar, 175g plain flour, 50g cocoa powder and 2½ tsp baking powder. You might want to make the sponges over a few days, in which case wrap them well in cling film to prevent them from drying out.
Preheat the oven to 180 degrees C / 160 degrees C fan / gas mark 4. Take your rectangular baking tin, line with baking parchment and grease well.
Put the butter and sugar into a large bowl and beat with an electric hand whisk or in a stand mixer until light and creamy. Thoroughly beat in each egg, one by one. If the mixture starts to split, add 1 tbsp of the flour to bring it back.
Sift in the rest of the flour, cocoa powder and baking powder and fold them in. Be gentle but make sure the mixture is fully combined, including any flour at the bottom of the bowl. Put this into the baking tin, smooth the batter out with an offset palette knife and bake for 40-45 minutes.
Check that the cake is cooked by poking a cocktail stick into the centre: if it comes out clean then it’s cooked; if it’s got cake mix on it, give the cake another few minutes before testing again. Take out of the oven and set on a wire cooling rack. Once cool enough to touch, pop the cake out of the tin and return the sponge to the rack to fully cool. Repeat x 3.
Chocolate buttercream
To make the chocolate buttercream, beat the butter in a large bowl with an electric hand whisk or in a stand mixer. Pour in the icing sugar and cocoa powder and mix slowly on the lowest setting on your mixer until completely incorporated. Add a tablespoon of milk at a time to the mixture if you need to soften the buttercream.
Constructing the cake
To construct the cake, place the first sponge onto your cake board.
Take the next two sponges and cut holes in the middle of the cakes, 4cm from each edge. With my cakes, this was a rectangle of 18 x 13 cm and I used a ruler and a sharp knife to make sure the holes were precise. Put the cut-out sponges to one side.
Using an offset palette knife, spread the chocolate buttercream onto the base sponge around its top edge, up to 4cm in from each side.
This is the trickiest part of making this cake: very, very carefully place the hollowed rectangle of cake onto the base sponge. Spread the chocolate buttercream on top of this rectangle and again, very carefully add the next layer.
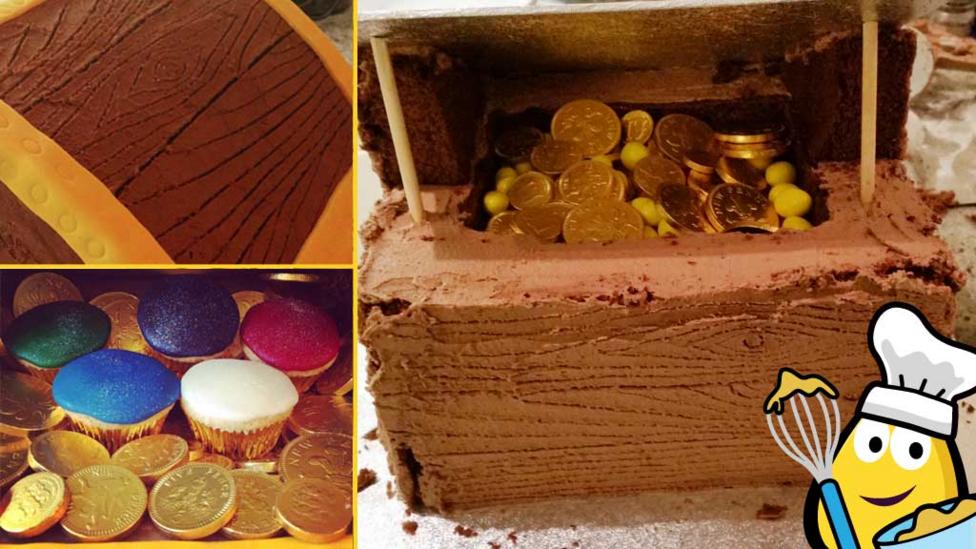
Coat the outside of the entire cake with chocolate buttercream and using a toothpick, carve a wood grain effect into the buttercream. Don’t worry about the cake edges looking messy as this will be covered by fondant.
Fill the hollow with the coloured sweets. With my version, I separated out all of the yellow sweets to put these at the top to look more like treasure. Put gold coins on top of these.
To make the open lid, cut a cake card to the size of your sponges. I kept the angle of my lid at around 30 degrees so that the top wouldn’t slide off. Poke holes through your cake card with the tip of a sharp knife for the dowel to pierce the bottom of the top cake and keep it in place. Use the leftover chocolate cake from the centre of the sponges to make chocks to support the cake card at the back. Poke the dowel through the base cakes as in this picture and poke them about 1cm through the cake card. Use chocolate buttercream to stick the chocks in place and to stick the cake card to the chocks. Leave this to set for about an hour.
For the lid, carve the top sponge with a sharp knife to give it a slightly curved shape. Stick this onto the cake card with chocolate buttercream and coat with buttercream all over. Use a toothpick to create the woodgrain effect again.
Using your yellow gel colouring, evenly colour the fondant and roll it out to around 3mm thickness. Cut the fondant into long strips around 4cm wide. Stick the fondant around each edge of the chest and smooth the corners with the flat edge of a knife. The chocolate buttercream should still be soft enough for the fondant to stick to but if not, use a knife to liven up the edges a little.
Use the end of a biro to make rivet patterns all around the fondant (see picture).
Gem’s gems
Preheat the oven to 180 degrees C / 160 degrees C fan / gas mark 4
Put the butter, sugar and vanilla paste into a bowl and beat with an electric hand whisk until light and creamy. Thoroughly beat in the egg
Sift in the flour and baking powder and fold them in. Divide the mixture into 12 mini cupcake cases and bake in the oven for around 10 minutes. I have a mini cupcake tin, but if you don’t you can place the mini cupcake cases in a normal cupcake tin
When the cupcakes are cooked, place on a cooling rack to cool completely
Mix 250g icing sugar in a bowl with about a teaspoon of boiling water. If this is still too thick, add more water in very small quantities. Divide the icing into five small bowls and add blue, green, purple and red gel food colourings to four of the five bowls. Spread the icing onto each cooled cupcake and smooth down with a knife dipped in boiling water. Sprinkle edible glitter onto the top of each cupcake and when the icing has set, place the gems inside the treasure chest
Take the remaining red icing and load a small piping bag with a 2mm nozzle. Pipe ‘Swashbuckle’ or a Happy Birthday message to the lucky kid who’s getting the fruit of many hours’ labour!
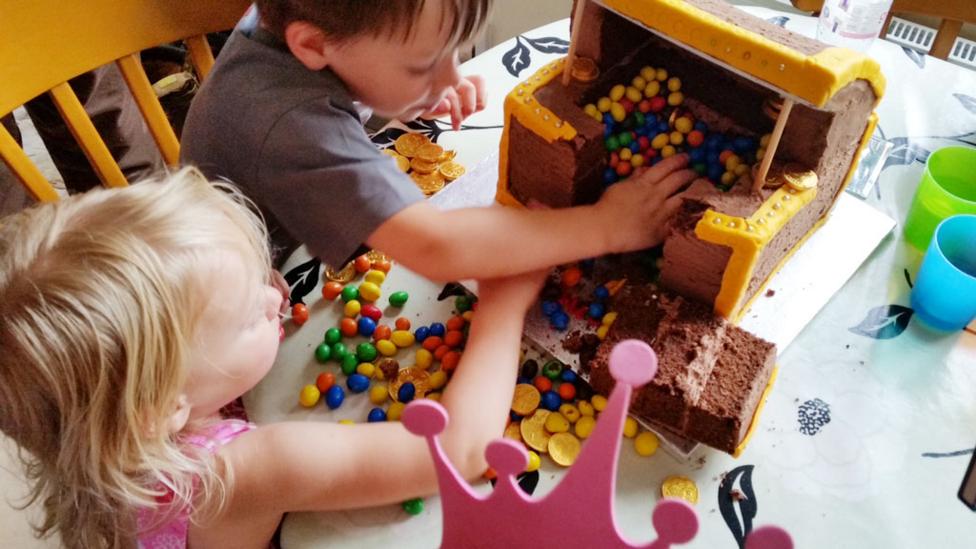
Present the cake to some very excited and grateful children, who will go mad for the sweets tumbling out of the middle of the cake when it’s cut into, as my nephew and niece did in the picture below
For more baking tips and tricks, read Richard's blog.
If you're looking for some further inspiration for a little one's birthday or party, why not check out our CBeebies-themed cake board on Pinterest.
Get the rest of Richard's CBeebies cake recipes.