How to make the perfect pasta
Flour and eggs is all you need to create one of the world's most popular and loved dishes - pasta. Make it fresh when you want to get creative for a truly special meal.
It is probably sensible to state here that my cupboards are never without several packets of dried pasta at any one time. What these packets offer, all shapes and sizes, is a reliable, speedy supper. This noted and my conscience clear, if there is a kitchen task more rewarding than making fresh egg pasta then I am not sure I know of it.
It is the alchemy of two everyday ingredients (possibly three) in an age-old practise: flour and eggs are mixed, the resulting dough then kneaded, rested and rolled by hand or using a simple hand-cranked pasta machine. It is worth noting there are some extremely efficient electrical appliances on the market that will make the task even more of a cinch. A food processor or mixer to knead the dough, together with a pasta attachment to roll and cut the finished dough to size are both useful bits of kit if making pasta becomes your thing!
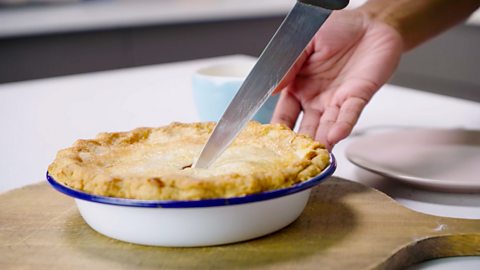
Claire shows you how easy it is to make pasta from scratch
The flour
I recommend using ‘00’ grade wheat pasta flour. ‘00’ flour has a finer texture than plain flour and will make for a silkier textured fresh pasta. Egg pasta can be made relatively successfully with plain flour, and non-egg pasta can be made with fine semolina flour or strong white flour (as in this pici cacio e pepe).
In all cases, for the pasta to be supple but still with strength to hold its shape on cooking, vigorous kneading when making the dough is essential. It is through the process of kneading that gluten develops in the pasta which will help to make a dough that is both flexible and durable to roll to shape.
The eggs
Eggs can vary wildly in size, and it is here where careful observation must help to govern the process. I have used a simple ratio of 1 egg to 100g ‘00’ grade flour to make the dough. If you choose to add an extra yolk to this ratio, your pasta will have a richer, sleeker feel (used to great effect in silk handkerchief pasta, but for the purposes of not having to then repurpose leftover egg whites I urge you to stick with this simple, thrifty ratio.
In short choose a good-sized egg, and if your eggs are on the smaller side, hold back with a tablespoon or two of the flour, only incorporating this as you get a feel for the dough. Also too, a pasta dough too rich in egg yolk will tend to compete with the sauce you serve it with. Fresh egg pasta is traditionally paired with slow-cooked meat ragú and creamy, buttery sauces, all quite rich in profile. Egg yolks lend a decadent flavour and texture to the pasta dough, but it is the egg whites that bring a pliability and elasticity to the finished dough and so are equally important.
Silk handkerchief pasta
Antonio Carluccio's pasta has more egg yolks for added silky richness
The third ingredient
Salt, the phantom third ingredient, is a thorny issue amongst chefs. Some will urge you to leave salt out of the process entirely until you come to cook the pasta in well salted boiling water, the thinking being that salt will draw out moisture and dehydrate the dough. Others will tell you it is out of the question to produce a pasta dough that has not been seasoned from the off, tasteless and bland as it will turn out to be. I will leave this with you to decide but will say this, do not be tempted to use a coarse or flaky salt as both will tear the dough when you come to roll it. You have been warned.
Resting and rolling
With your pasta dough kneaded, plump and pliable and feeling a little like a cross between plasticine and playdough, all at once firm, soft and beautifully cohesive, it is important to rest the dough for at least 30 minutes. Resting will ensure the flour is hydrated and will make for a smoother pasta dough that is much easier to roll.
You can absolutely roll pasta by hand, but this will require a certain amount of effort to roll and fold and stretch the pasta to the required thickness of a 10p coin. A machine will make this easier, and help to achieve the very thin pasta needed for filled and folded ravioli or tortellini.
If you plan to use a pasta machine, I think it wise to fold the dough in on itself a couple of times, pushing it through the widest setting to begin with, incrementally working the dough through each of the settings until you get to the finest setting.
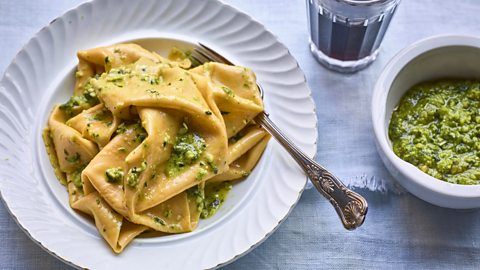
I personally feel you can get away with the second to last setting for tagliatelle/fettuccine. I feel it’s nice to have a bit more integrity to the cooked pasta, holding its own against any sauce or ragú.
A light dusting of semolina flour can help with the rolling and storing of pasta before you come to cook it. Rolling out the pasta into wide sheets and setting aside to dry for ten minutes on a semolina-dusted surface will mean the pasta is less likely to stick to itself when run through the cutter.
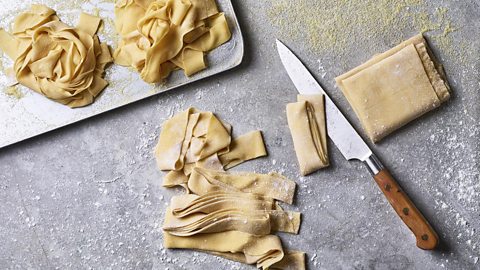
Cutting
Cutting by hand is an option if you want to have wide ribbons of pappardelle. With the sheets liberally dusted, fold both ends into the middle of the sheet, then repeat until you have a paperback-sized parcel. Use a sharp chef’s knife to cut the ribbons, using a ruler if you are a stickler for consistency. Immediately unroll and untangle the ribbons and give them a good swirl in the semolina to ensure they don’t stick while you continue with the rest.
A pizza wheel (or a pleasingly crinkly pasta wheel) makes cutting squares easier. These can be filled, as below, or pinched into butterfly-shaped farfalle.
If you are using a machine to cut the pasta, you may need to work with less long sheets to make it manageable (and edible). Cut them in half across the middle before running through the cutters.
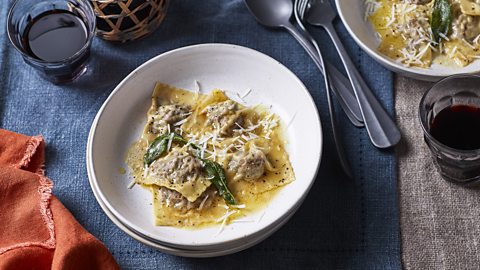
Filled pasta
If you are filling the pasta for ravioli or any other filled pasta, there are a few tips for ensuring each little parcel cooks to perfection. Allow enough space between the small blobs of filling, so that each can be completely sealed. As you work along the row, be aware that you are trying to eliminate any air bubbles sitting alongside your filling. These will expand in the heat during cooking and pop the pasta parcel open, spilling that tasty filling into the sea of boiling water. Likewise, the filling should be very soft so that it doesn’t poke a hole in the pasta.
On a side note, when the filled pasta is trimmed, all those odds and ends can be used. Cut them into odd bite-sized shapes, lay out on a tray in a single layer and freeze, before transferring to a bag for later use. These are maltagliati in Italian, and are often used in thick, hearty soups.
Claire shows you how to fill ravioli
Cooking the pasta
With your pasta made and ready to cook, it is worth noting again that fresh pasta freezes brilliantly, stored on a light dusting of semolina, and sealed in an air-tight container. It takes just two more minutes to cook from frozen, so it might be worth your while to make enough of a batch to enjoy some fresh and some for the freezer, for an easy midweek win.
To cook fresh pasta a large pot of well-salted water, at a fast-rolling boil is crucial. It should be big enough for the pasta to move around the pot while cooking with as much surface of the pasta in contact with the salty water as possible. Using plenty of water to cook the pasta will also dilute the starchy bath that could fuse the strands together.
All the time and effort in fresh pasta is up front, and cooking is the quickest part of the process. Put simply, when the pasta rises to the surface of the water, usually around 1½–2 minutes, it is cooked. At this point grab a mugful of the starchy, salty pasta water. This secret ingredient will loosen your sauces, helping them coat the pasta better, and will give sauces body and silkiness.
This is the quickest introduction to making fresh pasta, and thousands of years of creativity have yielded hundreds of variations of shape and combinations of flavours (not to mention those YouTube videos of nonnas churning out orecchiette at lightning speed). But don’t be daunted, that’s the main thing, you can do it.