How to improve your cooking in 2023
Want to take your cooking up a notch or three? This is how to cook like a pro chef at home by mastering five classic techniques

BBC Three’s Young MasterChef sees up-and-coming food talent, aged 18-25, put their kitchen skills to the test in the hope of impressing the judges and snatching that crown. I am, happily, one of said judges.
As a Michelin-trained chef, one of my roles in the show is to nurture the fresh-faced contestants – the next-generation of top chefs – and help them to hone their dishes and become the best cooks they can be. Hopefully I’m teaching them a few new kitchen skills along the way – and I’m learning lots from the experience, too.
I’ve spent more than 10 years in professional kitchens and am often asked for tips by people who want to improve their cooking skills. There are a few obvious answers, of course, like properly seasoning food, the importance of resting ingredients and finding the right flavour combos.
However, when I start talking about key techniques which will really take your cooking to the next level, people can start to feel a little intimidated. So, I want to share five of these techniques with you to hopefully prove that, despite seeming really impressive, they're actually pretty straightforward to master.
Beurre noisette
Butter is big in the food world right now, with trends like butter boards and homemade butter taking over the internet. One of the classic ways butter is used by high-end chefs is for making beurre noisette. This translates from French to ‘hazelnut butter’ but it's also known as brown butter or nutty butter, because of its flavour.
It's often used in baking, especially for cookies and cakes as it adds a deeper flavour, and I like to use it in pasta sauces or as a topping for gnocchi if I’m feeling fancy.
Gnocchi with sage beurre noisette
Gnocchi with sage beurre noisette sounds fancy but it's simple to make
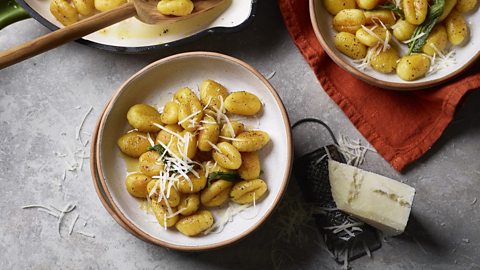
Beurre noisette is simply butter that's been fried until it browns. Cooking butter in this way causes the colour to darken into a caramel-like hue, while the flavour also develops a caramelised, nutty character.
To make it, the only ingredient you need is salted butter. Just put it in a pan fry it on a high heat – you’re going to want to get it frothing and foaming. Then, you’ll see the milk solids start to caramelise and go brown and notice that lovely nutty smell. If it's not going immediately from the pan into your recipe, make sure you have a bowl nearby to pour it into so that it stops cooking – you really don't want it to burn.
Want to know more? Here’s a video of me making beurre noisette.
Clarified butter

Sticking to the butter theme, let’s talk about clarified butter. It's essentially butter that has had the milk solids removed, so it can be cooked at a higher heat and for longer periods of time than regular butter, which can burn easily.
It's great for using in hollandaise, fondant potatoes and vegetables, as well as for sautéing meats and fish.
There are various ways to remove the milk solids from your butter but I’ve found the easiest to be a bit of a cheat’s method. It’s quick, efficient and does the job every time, using a kitchen essential that some chefs may say they’re too good for. I, however, am its biggest fan. It's called (drumroll, please) the microwave.
Chop your butter into chunks and place it in a dish, then microwave it until it has completely melted. The golden rule is to not stir it at any point, because you want the buttermilk (milk solids) to settle at the bottom of the dish. Then, set your bowl aside to cool: the clarified butter (on top) will firm up, whereas the milk solids will stay liquid. Once it's solidified, create a hole in the corner of the dish down to the buttermilk and pour the liquid away.
Once you’ve been able to do this you should be able to lift the clarified butter out of the dish. Then, scrape away any excess liquid and dry the slab off – and that's it. You can melt it back down and use it for whatever you want.
Confit garlic
Thanks to your new knowledge of how to clarify butter, you can now do something else incredible: confit your garlic.
The term 'confit' means cooking something in fat at a low temperature for a long time to achieve a deeper flavour. So, imagine regular garlic but then turn the flavour dial up by 1000. It’s super decadent with a smooth, silky texture and rich, intense flavour.
Confit garlic
You can use your new knowledge of clarified butter to make confit garlic
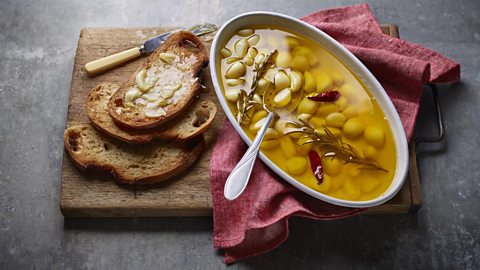
Begin by preheating the oven to 130C/120C Fan/Gas ¾. Place lots of peeled garlic cloves in an oven-proof dish with your clarified butter. You can throw in some rosemary sprigs or whole chillies too, if you like. Roast in the oven for 1½ hours, checking on the garlic regularly to make sure it is not burning and stirring it occasionally. If it looks like it’s cooking too fast, then turn the oven temperature down.
Use it in place of regular garlic in pasta sauces, garlic bread or meat rubs or, to really get the most out of it, keep it simple by squishing onto toast. Believe me, it'll make you appreciate garlic on a whole new level.
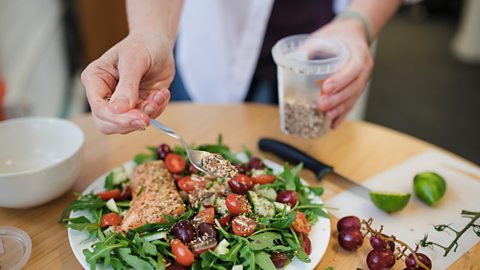
Herb-infused oils

This one is as delicious as it is aesthetically pleasing, and it’s a technique every professional kitchen insists its chefs learn. I’m talking about herb-infused oils. These are great for drizzling over soups or sauces, but can add flavour and colour to pretty much any dish. They're also great for using up herbs rather than throwing them out, and can even be frozen. Try using your favourite herbs like coriander, parsley or chive – even spring onion works well.
To begin, I blanche the herbs in boiling, salted water then pass them through a sieve and place straight into ice-cold water. Squeeze as much liquid out of the herbs as possible before piling them into a blender with your chosen oil. After blending, put the mixture into the freezer for a short while before finally draining it through a cloth or sieve.
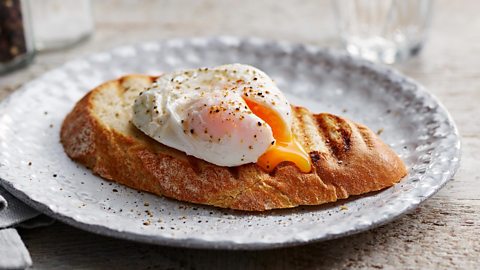
Poached eggs
In a brief departure from my love of butter and oils, we need to talk about poaching eggs. A poached egg isn't just a toast topper (though, it is an amazing one. It's so versatile and can improve all kinds of dishes. Making soup? Put a poached egg on it. Cooking haddock? Put a poached egg on it. Having pancakes? You get the gist.
Poaching an egg can seem tricky, but I promise it's relatively simple once you get the hang of it.
My best tip is a splash of white wine vinegar which helps to stabilise the egg whites – there’s science to it, but I’ll spare you.
You add the vinegar to a very slowly simmering pan of water, give it a slight stir and then drop your egg – which should be as fresh and cold (straight from the fridge) as possible – into the centre. I like mine to have a soft, runny yolk with a firm white, which normally takes around three minutes. Then, I drain the poached egg on a piece of kitchen towel before serving.
By following this method you will reduce the risk of wispy, soggy and undercooked poached eggs and, with a bit of practice, will achieve the perfect yolk every time.
Watch BBC Three's Young MasterChef on iPlayer now.
Originally published January 2023
Poached eggs. video
Poached eggs on toast